MouseMaze

How to Use
- Extract the .zip
- NOTE: you will likely need to update your Java to run the programs. The latest Java downloads can be found at this link.
- Read the explanations of each program below:
MouseMaze.jar
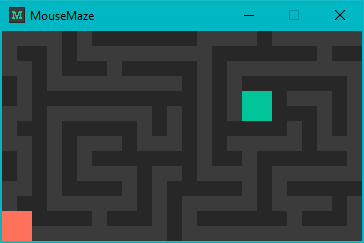
This is the actual game. Once you’ve placed your cursor on the starting square (red-orange), you can begin navigating towards the end square (green) with your cursor. The dark squares are walls and should be avoided (you will lose if you touch them). You do not need to click anywhere or drag anything, just move your mouse. If you lose (either by cheating or by touching a wall), you will be able to try again. Additionally, you can press ‘f’ to enable path drawing.
MazeMaker.jar
This program allows you to create new mazes. Press ‘1’ to set the square at the mouse’s position to a wall, ‘2’ to set it to a start square, and ‘3’ to set it to an end square. To reset a square, press ‘4’. To clear the entire maze, press space. To generate random walls (warning: clears current maze), press ‘0’. When you have finished making your maze, press enter to copy it to the clipboard. Now that the maze has been copied, you can either add it to MouseMazes.txt on a new line, or you can share it with other people. If for some reason the contents of MouseMazes.txt look like ‱‰〠ㄠ《റ or some other strange characters, try opening the file with another text editor, such as VSCode.
FindPath.jar
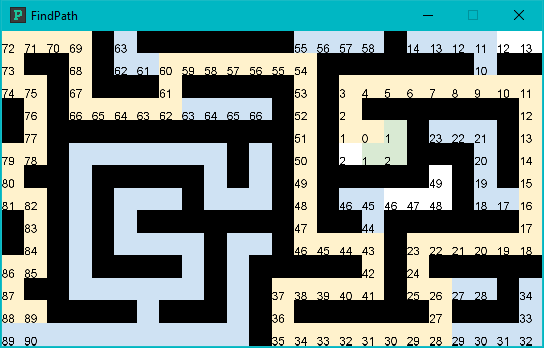
This program will find the shortest path between two squares, an end square and one of your choosing. Once the window opens, press enter for a random maze, or type in the maze’s number (then press enter) to load a specific maze. Once the maze has loaded, click where you want pathfinding to start from. The program will find an end square, and then draw the shortest path from it to the square you chose. At any point you can press ‘d’ for debug mode (shows counters). The algorithm is based of the example on this Wikipedia article.

Updates
November 28th, 2022
- Mazes are now loaded from an external file
- New mazes!
- “ERROR: no possible path” message (FindPath)
- Ability to backspace when entering a maze number (FindPath)
November 13th, 2022
- Initial release